
oidc-provider is an OpenID Connect library for node.js, allowing you to create your own OAuth authorization server and OpenID provider.
In this article, you’ll see how fast it can be to set up your own authorization server with oidc-provider and how to use it with some basic OAuth and OpenID Connect use cases.
What is oidc-provider?
oidc-provider is an open-source library that allows your node application to act as an OAuth authorization server. It also supports OpenID Connect and pretty much every OAuth extension standard available, including some draft standards. It is even certified for the various OpenID Connect flows and FAPI 1.0 (required for use with Open Banking).
oidc-provider runs in a codebase that you build and own. The library provides the protocol support, while you provide everything else. This offers you a high degree of flexibility where you can use any user store, user interface, or database, not unlike IdentityServer. This is in contrast to many OAuth and OpenID Connect implementations, which are often configuration-based and resistant to any form of modification.
Project Setup
Let’s get started with oidc-provider by first creating a basic node application.
You can install oidc-provider from npm with the following command:
npm init -y
npm install oidc-provider --save
At time of writing, oidc-provider was on version 8.0.0.
oidc-provider is an ECMAScript module, so you’ll need to enable support for that to import the module.
You can do this by either using .mjs files everywhere, rather than .js, or by setting type in your package.json to “module”.
Implementing oidc-provider with express
First, import Provider and initialize Provider.
Provider requires an issuer, which is the value that will be used as your token issuer.
In this example, it is the URL the authorization server will be runnin.
You’ll be adding more configuration to this later.
import Provider from 'oidc-provider';

const oidc = new Provider('http://localhost:3000');
oidc-provider works well with most web application frameworks such as express, fastify, and koa.
There is also an in-built listen method on Provider, which allows you a host a standalone server.
For this example, you’ll be using the express web framework.
const app = express();
app.use('/oidc', oidc.callback());
app.listen(3000);
This is all you need to get a running instance of oidc-provider (where app.js is your server’s entry point).
node app.jsYou should see a number of warnings when you start the app. This is a good thing and you will need to address all of them before taking your new OAuth authorization into production.
oidc-provider WARNING: configuration cookies.keys is missing, this option is critical to detect and ignore tampered cookies
oidc-provider WARNING: a quick start development-only in-memory adapter is used, you MUST change it in order to not lose all stateful provider data upon restart and to be able to share these between processes
oidc-provider WARNING: a quick start development-only signing keys are used, you are expected to provide your own in configuration "jwks" property
oidc-provider WARNING: a quick start development-only feature devInteractions is enabled, you are expected to disable these interactions and provide your own
To confirm that the application is running correctly, you can navigate to its OpenID Connect discovery document.
OpenID Connect discovery document
The OpenID Connect discovery document (affectionately known as the “disco doc”) allows client applications to automatically configure themselves to use an OpenID provider, without the need for manual configuration or a formal metadata exchange. It allows them to discover the location of the various OpenID Connect endpoints and what configurations it supports such as grant types, response types, claims types and scopes.
This document is always available on the same path on every authorization server that implements OpenID Connect: /. well-known/openid-configuration.
So, if you’re following along with the above example, you’ll be able to find oidc-provider’s default discovery document on http://localhost:3000/oidc/.well-known/openid-configuration.
{
  "authorization_endpoint": "http://localhost:3000/oidc/auth",
  "claims_parameter_supported": false,
  "claims_supported": [
    "sub",
    "sid",
    "auth_time",
    "iss"
  ],
  "code_challenge_methods_supported": [
    "S256"
  ],
  "end_session_endpoint": "http://localhost:3000/oidc/session/end",
  "grant_types_supported": [
    "implicit",
    "authorization_code",
    "refresh_token"
  ],
  "issuer": "http://localhost:3000",
  "jwks_uri": "http://localhost:3000/oidc/jwks",
  "authorization_response_iss_parameter_supported": true,
  "response_modes_supported": [
    "form_post",
    "fragment",
    "query"
  ],
  "response_types_supported": [
    "code id_token",
    "code",
    "id_token",
    "none"
  ],
  "scopes_supported": [
    "openid",
    "offline_access"
  ],
  "subject_types_supported": [
    "public"
  ],
  "token_endpoint_auth_methods_supported": [
    "client_secret_basic",
    "client_secret_jwt",
    "client_secret_post",
    "private_key_jwt",
    "none"
  ],
  "token_endpoint_auth_signing_alg_values_supported": [
    "HS256",
    "RS256",
    "PS256",
    "ES256",
    "EdDSA"
  ],
  "token_endpoint": "http://localhost:3000/oidc/token",
  "id_token_signing_alg_values_supported": [
    "RS256"
  ],
  "pushed_authorization_request_endpoint": "http://localhost:3000/oidc/request",
  "request_parameter_supported": false,
  "request_uri_parameter_supported": false,
  "userinfo_endpoint": "http://localhost:3000/oidc/me",
  "claim_types_supported": [
    "normal"
  ]
}
Signing keys
If you navigate to the JWKS endpoint (on /oidc/jwks, but I’m sure you knew that from your discovery document), you’ll see that there is already a public key available.
However, this key is not suitable for production.
In fact, the associated private key is embedded in oidc-provider’s source code and this is one of the warnings you saw on app startup.
This private key is going to be used to sign any JSON Web Tokens (JWTs) such as your OpenID Connect identity tokens and OAuth access tokens. It’s pretty important, so you’re going to need a create and register your own as a JSON Web Key Set (JWKS).
const configuration = {
    jwks: {
        keys: [{
			"kty": "RSA",
			"alg": "RS256",
			"use": "sig",
			"d": "EF2Kky61jzvMYQ_B6ImXzCsQ8uQzbFJrGnB2azlpr_CFStjjUVKP4EKrSCVEasD6SGNJV2QSiNJr7j05nvuGmHMKa__rbU8fqP4qbDahUgCgWOq-zS5tGK6Ifk4II_cZ_V1F-TnrvmcOKMWBiSV-p8i72KpXXucbHGNRwASVs7--M55wp_m1UsybI2jSQ4IgyvGzTnvMmQ_GsX-XoD8u0zGU_4eN3DGc8l6hdxxuSymH0fEeL1Aj0LoCj6teRGF37a2sBQdU6mkNNAuyyirkoDqGZCGJToQLqX4F1FafnzjeIgfdneRa-vuaV380Hhr2rorWnQyBqOO27M5O_VAkJbfRaWJVrXTJ69ZgkU4GPdeYdklVL0HkU6laziTNqNMeAjnt4m51sWokVyJpvdWcb_vJ4NSCsRo7kHOz7g-UvWTXa8UW0DTDliq_TJ3rN4Gv0vn9tBlFfaeuLPpK4VNmRRDRXY_fcuzlnQwYExL9a4V_vCyGmabdb7PrUFPBcjR5",
			"dp": "SX52TkZEc_eLIk5gYrKjAC643LJIw1RxMBWWewRSGLn_rbrH1he3hy7AGDUV6Uon7zkNh9R5GBVuxmlluBRAGbrhIXAAf8sWeyma3F6FIAt-MH_VkfW5K2p88PLOyVGljlv8-Z3wzdKYOlDP4yFU18LqGMqaRSDLDGhILkuZhjLYA40sfYJeJTi_HVP5UyWL4ohayqUWCT2W3DgeDDThYHmufOaqlrSLhUst6uez_cDz0BXAYIZvUuPVL_n1-_px",
			"dq": "K1KYU77I6yyPA2u32rc0exp_TCG59hhpWxrmXN8yTXWyq_xYBhCJA_nHdY8UV25Hmd7q0iX2i8y2cCAFNWA5UWiSiNg9-fKRLI2nz53IM4dGfssOLwUk66wzX8r_u3XiLZsO7XNNtQZdcZmF0YuNTtzEdiNDhaOyHiwwHgShL36WNmUn00mZR__G5Qk60VvI8vsbvJU9xRnWuEVS1wRgyD7v6Nl9nIxb8N7oibCdTJLmgnRXPWvArsW0cJ-NURfr",
			"e": "AQAB",
			"n": "2QwX-NBMkQYedGpbPvHL7Ca0isvfmLC7lSc8XSOCLmCUIf6Bk_pdCNx2kxsmT81IoA8CfvJLHQj5vWKoVDFMLfwo4IujvsC3m2IrEg6jERE-YHfC3W5jKZtmzQYpfx5vC2_XTmcyPigtyaNVsftGfycES3B_tvphNsFmQcJjVGOsJQXXqh_TDv6FMcH4m9pngyw6wfe3GgAKA0dRTSfD0h7wLdNCeuid53lLpkQypTNdZ6_PiCMu2gr_cH5M0MPZtBb2TW12_2zOabExK1lI5-HvdPtbMT4Qzs2nd2NkjcWmlbKRZzq6IzyWt7W2EnfZDsi61PHECtTb-EQN2icl8Wnsp-0Bw66yviAOj0gn3X5hRLx-TknT_PnWMou17l5GoAojKDezcTW0iLlrfs2ixFlY28u7WklUN8uYhHvwgON6fsdefG-3bPpiRLBPZ_tgXa4doALsCwfXu2oz0vYktk31A-UYv92uJsKSUbK0_8ODTN0rslCqCYN_1a_aVt2P",
			"p": "--L5BX8juLlGJk8hdPgEUmJjD7SsZuMrdq3cSibkkbaWUE5CQQ7vhLPr2dWCS1jUnY9WyoCx9QCZvhTHjORX50ykkOyBso9VJjWvYPjsrPpF7_Y6V0dKlblDmbbmRT9BW-MgjbwTivu3c2OpMXh2XLF-FOTq3t3Brs7SRnhTkD6GBDFf3X95J0PF7NELa9z2-kzPSDYz3k-9FepXnRPBM_ViDzlRw4eKUdylVuhzGbC2TRSmab9BRP0wipQKd-f5",
			"q": "3Jd5CRJpQV3xUi3FiHHAwcjfsRkfXMrxfaXt0PjX2xWzxscYiDcyCF6VhHTAGsiq5SOtCp3l5mg6A9PzdR53AzM2-706D82fMwiUZvsLOVTepXkgriP_xw7rDlkOeAvjB80sL2G9scFliTzzRZ8I8E79A8DxZihfB75AIN9ijklEihnwxfhp2EgO5MYEyQRcqU1TT8wD8ekLMzd-kJUWyTz3BogiVJH__BQoB6kaDyjvQoxBgwh0hi72t9H5XqPH",
			"qi": "cwK0jhzwbu8BaTmTQhwfGiqwNN3v9F4nUQ4dtnBYRI6zlki4cLb2Mf9-VhyEsUYhhdTm8R7RwO9m5Xct3gEfozdk35wuvkVwkZgL3Uho5asao0xi4aENeUk5DCkU-paO3yLSDhIs9YYuYIDjUX6QuMCPjomypuE3SRm-Dg1PGOxYvX3w_P-0kd5iBFrm4jwGTZViFOr8tl_dXgDRDWDgofOYOYcmUv2_0zt1aO3j5dhEpwdkyuDMLfVZNpJQyopJ",
			"kid": "f262a3214213d194c92991d6735b153b"
		}]
    },
};

const oidc = new Provider('http://localhost:3000', configuration);
OAuth client credentials
Now let’s create a client application for the simplest OAuth grant type: client credentials. This grant type is suitable for machine-to-machine communication, for when some code just needs to get a token, without the need to act on behalf of a user.
By default, support for the client credentials grant type is disabled. You can enable the feature in your configuration:
const configuration = {
	// existing configuration
	features: {
        clientCredentials: {
            enabled: true
        }
    }
};
You’ll then need to configuration a client application. Let’s go for something super simple that just uses a client secret:
const configuration = {
    // existing configuration
	clients: [{
        client_id: 'app',
        client_secret: 'a_secret',
        grant_types: ['client_credentials'],
        redirect_uris: [],
        response_types: []
    }]
};
Using this client configuration, you can call your authorization server’s token endpoint and get yourself an access token. In this example, I’m using Basic authentication for the client ID and secret, but you could also use the client_id and client_secret parameters in the body.
POST /oidc/token

Headers:
Content-Type: application/x-www-form-urlencoded
Authorization: Basic YXBwOmFfc2VjcmV0

Body:
grant_type=client_credentials
This results in your typical token response, with an unstructured (opaque) access token.
{
    "access_token": "xplcyd_0e6sZxWQmkg7bc9rPOCFeWcQCOH2t_nDoh9-",
    "expires_in": 600,
    "token_type": "Bearer"
}
Introspection
In order to read this opaque token, you’ll need to call the authorization server’s introspection endpoint. This is a separate feature that again needs to be enabled.
const configuration = {
	// existing configuration
	features: {
		// existing features
        introspection: {
            enabled: true
        }
    }
};
You can then call the introspection endpoint with the access token and some credentials. For the sake of this demo, this will be using the client’s credentials, but in production this would likely be some credentials belonging to a resource (API) that is receiving this access token.
POST /oidc/token/introspection

Headers:
Content-Type: application/x-www-form-urlencoded
Authorization: Basic YXBwOmFfc2VjcmV0

Body:
token=xplcyd_0e6sZxWQmkg7bc9rPOCFeWcQCOH2t_nDoh9-
Warning: By default, oidc-provider stores tokens in-memory. Since you’ve enabled a new feature and restarted the app, you’ll therefore need to request a new access token in order to introspect it.
This results in a token introspection response, most notably telling you that the token is active, when it expires, who issued it, and what application it was issued to.
{
    "active": true,
    "client_id": "app",
    "exp": 1674376730,
    "iat": 1674376130,
    "iss": "http://localhost:3000",
    "token_type": "Bearer"
}
This token isn’t valid for any specific protected resource. It’s just the default, unscoped access token that oidc-provider will issue.
Access tokens, resources, and scopes.
To protect an API with oidc-provider, you must enable the resource indicators feature, which offers the functionality for OAuth resource indicators (RFC8707). This is where you can model an API as a resource and build individual scopes against it, such as read and write. It’s also how you can switch to JWT access tokens.
For the sake of the tutorial, let’s enable the feature and hardcode the resource indicator lookup to know about a single API with an ID of urn:api.
features: {
    // existing features
    resourceIndicators: {
        enabled: true,
        getResourceServerInfo(ctx, resourceIndicator) {
            if (resourceIndicator ==='urn:api') {
                return {
                    scope: 'read',
                    audience: 'urn:api',
                    accessTokenTTL: 1 * 60 * 60, // 1 hour
                    accessTokenFormat: 'jwt'
                }
            }

            throw new errors.InvalidTarget();
        }
    }
Now, you can update your token request to include this resource and scope.
POST /oidc/token

Headers:
Content-Type: application/x-www-form-urlencoded
Authorization: Basic YXBwOmFfc2VjcmV0

Body:
grant_type=client_credentials
&resource=urn:api
&scope=read
Which now results in a JWT access token that conforms to the JWT profile for OAuth 2 access tokens (RFC9068).
{
    "access_token": "eyJhbGciOiJSUzI1NiIsInR5cCI6ImF0K2p3dCIsImtpZCI6ImYyNjJhMzIxNDIxM2QxOTRjOTI5OTFkNjczNWIxNTNiIn0.eyJqdGkiOiJjUjZZTy02TVFVTDdQa2V4RzBkNUMiLCJzdWIiOiJhcHAiLCJpYXQiOjE2NzU1NDY5MDUsImV4cCI6MTY3NTU1MDUwNSwic2NvcGUiOiJyZWFkIiwiY2xpZW50X2lkIjoiYXBwIiwiaXNzIjoiaHR0cDovL2xvY2FsaG9zdDozMDAwIiwiYXVkIjoidXJuOmFwaSJ9.05G7RszbJJjg4eisfdmcl931vcBbghPq7tL249_GeIc6SqhhFqkn1AFF_L6acSO_cCucXl9xLdSU4D4izqXmYatlkxY7Z4QGdsrFugS5Pf7iz5yMQ2eEPuwYYUEWvPXScjzY8adPW78hnZLA6XAN5Kkj5_DhGAsQ-zInD7U5D5C9lvmHdPMPEis_SH3R9E4SrIkj9Q0R_aFQrtvdki79R4WpsIhN1-a_NcNl__6weq71qHKLz2ATzGURTBBHKNuFjZqQylzUTPLT6dm82d1o6C2G_XgzsmyGkOYUvrKFngJSXP_V5FJ9om3lmke-MT7OMpMnElKt5VWNuhL6m82R2ZybeIGOPQCLOZ2CNjRsiYAt6oZCXDzxV0fMPa3OOV-mJRDr1GyLkNL2SoOoHlO59WdF-wG2WGvM_2PlB2egr0eXrny9DEbwSZIpHeihDqJ_-oYS9VWbmIYEteDHZNOrfFmgDByj3wILRAEvSABo6J8oZYJL3O6DWdtqkxgJgqQu",
    "expires_in": 3600,
    "token_type": "Bearer",
    "scope": "read"
}
If you decode this token, you can see that it now contains the required audience claim to restrict it to a single resource, along with the scope and client_id claims to help drive authorization checks at that API. A similar set of claims will be returned from the introspection endpoint if you continue using the opaque token format.
{
  "alg": "RS256",
  "typ": "at+jwt",
  "kid": "f262a3214213d194c92991d6735b153b"
}
{
  "jti": "cR6YO-6MQUL7PkexG0d5C",
  "sub": "app",
  "iat": 1675546905,
  "exp": 1675550505,
  "scope": "read",
  "client_id": "app",
  "iss": "http://localhost:3000",
  "aud": "urn:api"
}
There’s a lot more to the resource indicators feature in oidc-provider, including ways of restricting what resources and scopes a client application can request (as is best practice). I recommend reading the documentation for this one.
OpenID Connect authorization code
Now that you’ve seen how to use oidc-provider to protect an API, let’s try out a user interactive flow and also throw identity in the mix using OpenID Conect.
First, you’ll need to register a new client that can use the authorization code grant type, which is the recommended grant type for most user interactive flows.
This client will still need a client secret (or other client authentication mechanism) to access the token endpoint and allowed response types should only be code.
You’ll also need a redirect URI, which for this demo will be another localhost site that may or may not exist.
const configuration = {
    // existing configuration
	clients: [
	    // existing client applications
	    {
            client_id: 'oidc_client',
	    	client_secret: 'a_different_secret',
	    	grant_types: ['authorization_code'],
	    	response_types: ['code'],
	    	redirect_uris: ['http://localhost:3001/cb']
    }]
};
You can now make an authorization request to the authorization server, asking for the user’s identity.
Good news for standards fans, Proof-Key for Code Exchange (PKCE) is enable by default.
This means that you will need to create a random value for your authorization request and include a SHA-256 hash of it in the authorization request.
Here, I am using WzE2NywxMDgsMTEyLDU1LDIxOSwxNjksODAsMTQxLDQsNCwyNTMsOCwxNDksNDYsNjAsMTI4XQ (the code verifier), which becomes nqWxOqTBUa9iu9G5pL6LWChLS5TYEcyhwWbbQlj79ZU (the code challenge).
You do need to include the code_challenge_method as there is no default.
http://localhost:3000/oidc/auth
    ?client_id=oidc_client
    &response_type=code
    &response_mode=query
    &redirect_uri=http://localhost:3001/cb
    &code_challenge=nqWxOqTBUa9iu9G5pL6LWChLS5TYEcyhwWbbQlj79ZU
    &code_challenge_method=S256
    &scope=openid
By default, oidc-provider has the devInteractions feature enabled, which means you get a basic debugging UI included out of the box.
This is great news if you are testing protocol flows or oidc-provider itself.
Since there is no user currently logging in, you will be redirected to a login page.
You’ll notice the URL is something like /oidc/interaction/WPjU-CoXI5dwGBviGnHl0.
The final part of the path is a session ID which allows oidc-provider to track what user interactions have taken place and the details original authorization request so that it can resume the OpenID Connect flow after user interaction is complete.
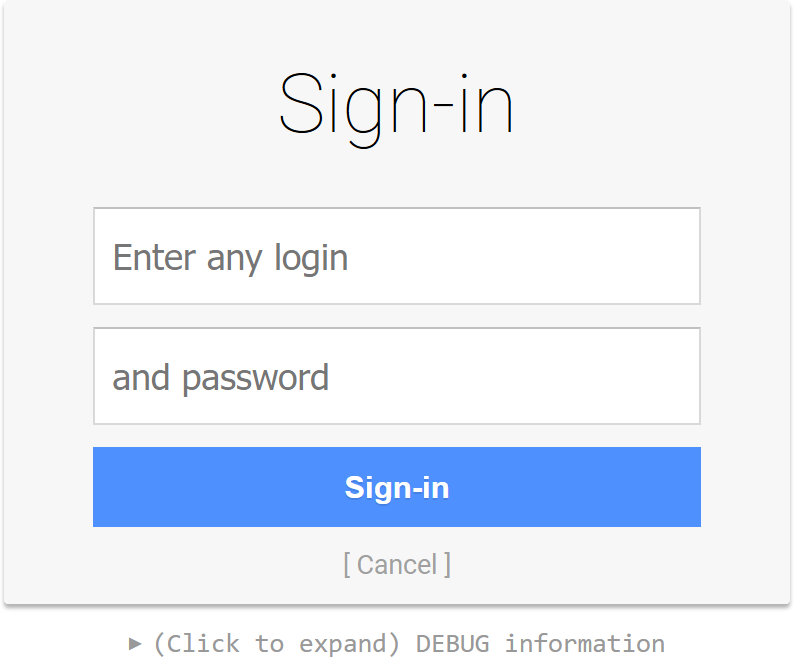
With the default user store and interaction service, you can enter any username and password here. The username will be used as your subject claim.
You’ll then be met with a consent screen. Check out the debug information to see how your session has changed.
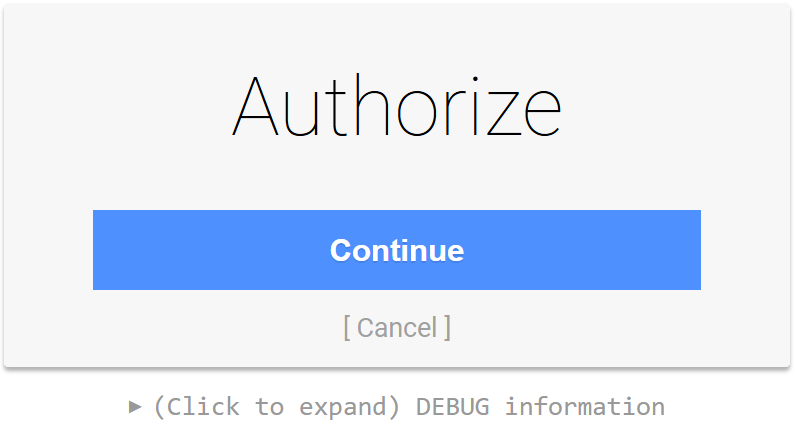
Once that’s authorized, oidc-provider will redirect you to your imaginary (or not) client application, along with an authorization code and the issuer parameter (which helps if your app uses many identity providers).
http://localhost:3001/cb?code=D62RcBQonk9Y_laJWbEoh7JTsBTtQ3R-ALbKbnWhgFn&iss=http://localhost/3000You can now make a token request using the authorization code and the corresponding code verifier to the code challenge you sent (the plaintext of the hash/proof-key), remembering to authenticate the client to the authorization server.
POST /oidc/token

Headers:
Content-Type: application/x-www-form-urlencoded
Authorization: Basic b2lkY19jbGllbnQ6YV9kaWZmZXJlbnRfc2VjcmV0

Body:
grant_type=authorization_code
&code=D62RcBQonk9Y_laJWbEoh7JTsBTtQ3R-ALbKbnWhgFn
&code_verifier=WzE2NywxMDgsMTEyLDU1LDIxOSwxNjksODAsMTQxLDQsNCwyNTMsOCwxNDksNDYsNjAsMTI4XQ
This returns your usual token respone, this time with both an access token (that can be used to call the user info endpoint) and an identity token.
{
    "access_token": "lAj7lW0D6CHqwE92MIVxMAFmHjVTXbwlq_zK-xxdnua",
    "expires_in": 3600,
    "id_token": "eyJhbGciOiJSUzI1NiIsInR5cCI6IkpXVCIsImtpZCI6ImYyNjJhMzIxNDIxM2QxOTRjOTI5OTFkNjczNWIxNTNiIn0.eyJzdWIiOiJib2IiLCJhdF9oYXNoIjoiTUhuZi1VSEttenpDRlNHTUc1OGxQZyIsImF1ZCI6Im9pZGNfY2xpZW50IiwiZXhwIjoxNjc1NTE2NTE4LCJpYXQiOjE2NzU1MTI5MTgsImlzcyI6Imh0dHA6Ly9sb2NhbGhvc3Q6MzAwMCJ9.DgMUY32GJSWGbJJ2C-rTORTArxpfizP10YVUSc8DUPMAk5RlNn1lC3mERU1qfatGR0KdGFPlJIRn-ZsEug4DBeweam7FIl4XoAcbea7THpSA7oSwwM_Q9f0uieTBNerf0YGNUvTtGiQMlrOD3Z5rBLVUE0yqORWv9Ya29BDhhCuuivzd4DC1tqOVbUp8QrvxxieyyngiCgnGd07nXL7OLPFygJw5_PUiBl1BsuDvS3G8G33AZVZMOP8ScJWbs1ULleeQx5OUmwg7sr-r0TGaDYN5hi-wtrFZjgJ1wW0ijywnNM-HJSvxzwR-18j8pi3rFHzB1D-u7EEy2f-S6VM3Vim8Ojd-n6RUtbnocvd-uV5zFT7T_50N2WagN9tO-BYyEkxW2xVdEMBOzs96ZZnwKYUv59N0b6w_fWItohxNk4gYAhYZbGFul4U7WHOlTCsRS7S-P7JYmedBwxk3LVyN8AClxUfq30syh5avMCrEx6BG9QPMoBBOFPqmWILwivkl",
    "scope": "openid",
    "token_type": "Bearer"
}
If you decode this identity token, you can see that it was signed used your private key and uses a subject claim of your test username. Expiry is an hour but that’s not the end of the world (it only needs to be a few minutes).
{
  "alg": "RS256",
  "typ": "JWT",
  "kid": "f262a3214213d194c92991d6735b153b"
}
{
  "sub": "bob",
  "at_hash": "MHnf-UHKmzzCFSGMG58lPg",
  "aud": "oidc_client",
  "exp": 1675516518,
  "iat": 1675512918,
  "iss": "http://localhost:3000"
}
Identity scopes
The subject claim alone is enough for a client application to identify a user and start a session, but it may also want to know some identity information such as name and email address. You can add support for this by configuring some scopes that authorize certain claims about a user to be accessible by a client application.
For example, here are a couple of the standard claims defined in the OpenID Connect standard:
const configuration = {
	// existing configuration
	claims: {
        profile: ['birthdate', 'family_name', 'gender', 'given_name', 'locale', 'middle_name', 'name', 'nickname', 'picture', 'preferred_username', 'profile', 'updated_at', 'website', 'zoneinfo'],
        email: ['email', 'email_verified']
	}
};
Adding these will update both the claims_supported and scopes_supported sections of your OpenID discovery document.
However, to populate them, you will need to add some users with those claims, which means you’ll need to implement your own user store beyond this demo.
Configuration beyond the demo
The above configuration is great for getting started with a test instance of oidc-provider. It’s similar to the demo templates for IdentityServer or the base installation of Keycloak. However, to get things ready for a real-world scenario and to start integrating user stores and client applications, you’ll to consider the following:
- Disable devInteractions and create your own user experience
- Configure a private key for signing cookies in order to prevent an attacker tampering with them
- Persisting oidc-provider data such as opaque access tokens, authorization codes, user sessions, and dynamically registered client applications
Source Code
You can find a working implementation of the above code in my samples repository on GitHub.