
IdentityServer is the popular OSS OpenID Connect and OAuth framework for ASP.NET Core. It allows your ASP.NET Core website to act as an OpenID Provider and OAuth authorization server, offering both Single Sign-On (SSO) and API protection out of the box. IdentityServer takes care of the protocol support, but user authentication is up to you, the developer.
In this tutorial, you’re going to see an IdentityServer implementation added to a basic web project, with examples showing how to configure client applications, API scopes, and user authentication. By the end of this tutorial, you’ll have a working IdentityServer implementation, using ASP.NET Identity, with an example ASP.NET Core client application and API (protected resource).
This article has samples for both IdentityServer4 and Duende IdentityServer (v5), targeting .NET Core 3.1 onwards. You can toggle between IdentityServer4 and Duende IdentityServer code as you progress through the article.
Contents

IdentityServer 3 vs IdentityServer 4
After the release of IdentityServer4 (aka. IDS4), IdentityServer3 entered maintenance mode, with only security fixes being released. However, in 2019, Microsoft dropped support for the OWIN libraries (Katana 3) that IdentityServer3 relied upon, and as a result, free IdentityServer3 support has ended.
If you are still using IdentityServer3 (or even IdentityServer2), ), I highly recommend that you migrate to the latest version of IdentityServer as soon as possible.
There are a fair few differences between IdentityServer3 and IdentityServer4. If you want to learn more, click here .
IdentityServer3 and IdentityServer4 are mostly compatible. They typically both implement the same specifications; they are both OpenID Providers; however, their internals are almost completely different. Luckily, when you integrate using OpenID Connect or OAuth, in the case of IdentityServer, you are not integrating to an implementation, but rather integrating using the OpenID Connect or OAuth specifications. In my experience, IdentityServer is one of the least opinionated implementations of these specifications out there.
IdentityServer is designed to run as a self-hosted component, which was difficult to achieve with ASP.NET 4.x due to MVC still being tightly coupled to IIS, and System.Web. This resulted in IdentityServer3 having an internal view engine served up by the katana component. With IdentityServer4 now running on ASP.NET Core, you can now use any UI technology you want and can host IdentityServer in anywhere that ASP.NET Core can run. This also means you can now integrate with existing login forms/systems, allowing for in-place upgrades.
The IdentityServer IUserService that was used to integrate your user store is also gone, replaced with a new user store abstraction in the form of IProfileService and IResourceOwnerPasswordValidator.
You must now implement user authentication yourself (and that’s a good thing).
In my experience, many people are still using IdentityServer3 (I’ve even had customers still using IdentityServer2). My recommendation is to seriously consider migrating to the latest version of IdentityServer as soon as you can. But, I admit, rewriting your authentication system, rather than building new features, can be hard to sell to stakeholders.
IdentityServer4 vs Duende IdentityServer
As of 2021, IdentityServer switched to a commercial license and is now know as Duende IdentityServer (kind of IdentityServer v5). Duende IdentityServer is still OSS, but the license now requires most organizations to purchase a license from Duende.
IdentityServer4’s will continue to be supported for the lifetime of .NET Core 3.1, which ends December 2022. However, for newer versions of .NET, you should Duende IdentityServer instead.
At the time of writing (September 2021), the IdentityServer4 and Duende IdentityServer codebases are largely the same; but that will change over time, especially as .NET releases more LTS versions. Currently, new Duende features include key management, dynamic loading of external identity providers, OAuth resource indicators, and access to a BFF client library.
Implementing IdentityServer on ASP.NET Core and .NET Core
Before starting this tutorial, please ensure you are using the latest version of ASP.NET Core and the .NET Core tooling. When creating this tutorial, I used .NET Core 3.1 and JetBrains Rider (Visual Studio is fine).
You’re going to start building your IdentityServer as an empty web app, without any MVC or Razor dependencies, or any authentication.
You can create this using dotnet new.
dotnet new webYou can achieve the same in Visual Studio, by creating an “ASP.NET Core Web Application” project using the “Empty” template. Just make sure you enable HTTPS and use no authentication.
The rest of this tutorial will assume that you are using https://localhost:5000 for your IdentityServer solution.
This can be configured in your launchSettings.json file (“Properties” in Visual Studio).
Now, let’s add IdentityServer by installing it from NuGet. When creating this tutorial, I used IdentityServer4 version 4.1.2 and Duende IdentityServer version 5.2.2.
dotnet add package IdentityServer4Next, head over to your Startup class, where you can start registering dependencies and wiring up your pipeline.
In your ConfigureServices method, add the following to register the minimum required dependencies for IdentityServer:
services.AddIdentityServer()
    .AddInMemoryClients(new List<Client>())
    .AddInMemoryIdentityResources(new List<IdentityResource>())
    .AddInMemoryApiResources(new List<ApiResource>())
    .AddInMemoryApiScopes(new List<ApiScope>())
    .AddTestUsers(new List<TestUser>())
    .AddDeveloperSigningCredential();
And then, update your Configure method to look something like the following to allow IdentityServer to start handling OAuth and OpenID Connect requests:
public void Configure(IApplicationBuilder app)
{
    app.UseRouting();
    app.UseIdentityServer();
}
With the above code, you have registered IdentityServer in your DI container using AddIdentityServer, used a demo signing certificate with AddDeveloperSigningCredential, and used in-memory, volatile stores for your clients, resources, and users.
You don’t have to call AddDeveloperSigningCredential when using Duende IdentityServer, since IdentityServer will manage signing keys for you.
By using AddIdentityServer, you are also causing all generated temporary data to be stored in memory.
You will add actual clients, resources, and users shortly.
UseIdentityServer allows IdentityServer to start handling routing for OAuth and OpenID Connect endpoints, such as the authorization and token endpoints.
With this setup, you can actually run IdentityServer already.
It might have no UI, not support any scopes, and have no users, but you can already start using it!
Check out the OpenID Connect discovery document at /.well-known/openid-configuration.
OpenID Connect Discovery Document
IdentityServer’s discovery document (affectionately known as the “disco doc”) is available on the path /.well-known/openid-configuration, as per the OpenID Connect discovery specification.
This document contains metadata information such as the:
- location of various endpoints (for example, the authorization endpoint and the token endpoint)
- location of it’s public keys (a JSON Web Key Set (JWKS))
- grant types the provider supports
- scopes it can authorize.
By having this standardized document, you enable the possibility of automatic integration and automatic key rollover.
IdentityServer Signing Credentials
Your signing credentials are private keys used to sign tokens. This allows for client applications and protected resources to verify that the contents of the token have not been altered in transit and that the token was created by IdentityServer.
IdentityServer uses the private key to create signatures, while other applications use the corresponding public key to verify the signature.
These public keys are accessible to client applications via the jwks_uri in the OpenID Connect discovery document.
When you go to create and use your own signing credentials, do so using a tool such as OpenSSL or the New-SelfSignedCertificate PowerShell command.
You can store the keys in an X.509 certificate, but there shouldn’t be any need to have the certificate issued by a Global CA.
IdentityServer is only interested in the private key here and verifiers are typically only concerned with the public key.
In fact, with the newest versions of IdentityServer, you are no longer constrained to just RSA keys. You can now use ECDSA in IdentityServer.
IdentityServer Clients, Resources and Users
Now that you have IdentityServer up and running, let’s add some data to it.
First, you need to have a store of client applications that are allowed to use IdentityServer, as well as the protected resources that those clients can use, and the users that can authenticate in your system.
You are currently using the in-memory stores whose registrations accept a collection of their respective entities, which you can now populate in code.
IdentityServer client applications
IdentityServer needs to know what client applications are allowed to use it. I like to think of this as a list of applications that are allowed to use your system; your Access Control List (ACL). Each client application is then configured to only be allowed to do certain things; for instance, they can only ask for tokens to be returned to specific URLs, or they can only request certain information about the user. They have scoped access.
internal class Clients
{
    public static IEnumerable<Client> Get()
    {
        return new List<Client>
        {
            new Client
            {
                ClientId = "oauthClient",
                ClientName = "Example client application using client credentials",
                AllowedGrantTypes = GrantTypes.ClientCredentials,
                ClientSecrets = new List<Secret> {new Secret("SuperSecretPassword".Sha256())}, // change me!
                AllowedScopes = new List<string> {"api1.read"}
            }
        };
    }
}
Here you are adding a client that uses OAuth’s client credentials grant type. This grant type requires a client ID and secret to authorize access, with the secret simply being hashed using an extension method provided by IdentityServer. After all, you should never store passwords (shared secrets) in plain text, and your secrets in production should have enough entropy to never be guessable. The allowed scopes are a list of permissions that this client is allowed to request from IdentityServer. In this example, the only permitted scope is api1.read, which you will initialize now in the form of an API resource.
IdentityServer resources & scopes
Scopes represent what a client application is allowed to do. They represent the scoped access I mentioned before. In IdentityServer, scopes are typically modeled as resources, which come in two flavors: identity and API.
An identity resource allows you to model a scope that will permit a client application to view a subset of claims about a user.
For example, the profile scope enables the app to see claims about the user such as name and date of birth.
An API resource allows you to model access to an entire protected resource, an API, with individual permissions levels (scopes) that a client application can request access to.
internal class Resources
{
    public static IEnumerable<IdentityResource> GetIdentityResources()
    {
        return new[]
        {
            new IdentityResources.OpenId(),
            new IdentityResources.Profile(),
            new IdentityResources.Email(),
            new IdentityResource
            {
                Name = "role",
                UserClaims = new List<string> {"role"}
            }
        };
    }

    public static IEnumerable<ApiResource> GetApiResources()
    {
        return new[]
        {
            new ApiResource
            {
                Name = "api1",
                DisplayName = "API #1",
                Description = "Allow the application to access API #1 on your behalf",
                Scopes = new List<string> {"api1.read", "api1.write"},
                ApiSecrets = new List<Secret> {new Secret("ScopeSecret".Sha256())}, // change me!
                UserClaims = new List<string> {"role"}
            }
        };
    }

	public static IEnumerable<ApiScope> GetApiScopes()
    {
        return new[]
        {
            new ApiScope("api1.read", "Read Access to API #1"),
			new ApiScope("api1.write", "Write Access to API #1")
        };
    }
}
IdentityServer IdentityResources
The first three identity resources represent some standard OpenID Connect scopes you’ll want IdentityServer to support.
For example, the email scope allows the email and email_verified claims to be returned.
You are also creating a custom identity resource called role which returns any role claims for the authenticated user.
A quick tip, the openid scope is always required when using OpenID Connect flows (where you want to receive an identity token).
You’ll see this in action shortly.
You can find more information about these core OpenID Connect identity scopes in the OpenID Connect specification.
IdentityServer ApiResources and ApiScopes
An API resource models a single API that IdentityServer is protecting. In OAuth, this is known as a “protected resource”.
An API scope is an individual authorization level on an API that a client application is allowed to request.
For example, an API resource might be adminapi, with the scopes adminapi.read, adminapi.write, and adminapi.createuser.
API scopes can be as fine-grained or as generic as you want.
Just remember, scopes represent what the user is authorizing the client application to do on their behalf. That does not mean that the user is allowed to perform an action. OAuth does not provider user-level authorization.
By setting the UserClaims property, you are ensuring that these claim types will be added to any access tokens that have this scope (if the user has a value for that type, of course).
In this case, you are ensuring that a user’s role claims will be added to any access tokens authorized to use this scope.
IdentityServer test users
In the place of a fully-fledged user store such as ASP.NET Identity, you can use the TestUsers class from IdentityServer:
internal class Users
{
    public static List<TestUser> Get()
    {
        return new List<TestUser> {
            new TestUser {
                SubjectId = "5BE86359-073C-434B-AD2D-A3932222DABE",
                Username = "scott",
                Password = "password",
                Claims = new List<Claim> {
                    new Claim(JwtClaimTypes.Email, "[email protected]"),
                    new Claim(JwtClaimTypes.Role, "admin")
                }
            }
        };
    }
}
A user’s subject (or sub) claim is their unique identifier. This should be something unique to your identity provider that will never change, as opposed to volatile data such as an email address.
With this test data, you can now update your DI container to look like the following:
services.AddIdentityServer()
    .AddInMemoryClients(Clients.Get())
    .AddInMemoryIdentityResources(Resources.GetIdentityResources())
    .AddInMemoryApiResources(Resources.GetApiResources())
    .AddInMemoryApiScopes(Resources.GetApiScopes())
    .AddTestUsers(Users.Get())
    .AddDeveloperSigningCredential();
If you rerun IdentityServer and visit the discovery document, you’ll now see that the scopes_supported and claims_supported sections are populated based on your identity resources and API scopes.
OAuth Functionality
To test your implementation, you can grab an access token from IdentityServer using the OAuth client you have configured. This will be using the client credentials flow, meaning your request will look like this:
POST /connect/token

Headers:
Content-Type: application/x-www-form-urlencoded

Body:
grant_type=client_credentials&scope=api1.read&client_id=oauthClient&client_secret=SuperSecretPassword
Which returns a token response:
{
  "access_token": "eyJhbGciOiJSUzI1NiIsImtpZCI6IjA3MzdCRDU2MUU2MTExM0UzMTVFRDQ3QUM1MzBCRkI5IiwidHlwIjoiYXQrand0In0.eyJpc3MiOiJodHRwczovL2xvY2FsaG9zdDo1MDAwIiwibmJmIjoxNjMwMTY4OTY3LCJpYXQiOjE2MzAxNjg5NjcsImV4cCI6MTYzMDE3MjU2NywiYXVkIjoiYXBpMSIsInNjb3BlIjpbImFwaTEucmVhZCJdLCJjbGllbnRfaWQiOiJvYXV0aENsaWVudCIsImp0aSI6IkY0MzZGREY5OUU4Q0Y2QTREMkM0QzY5M0FCQTdDMEY4In0.HG-1bNAv5OQf_Vn8vI_-G5rK1ueQhsN_VSx_M78rU_n85hc1BH7Nt6p3MKeGPDy6YYed9krpGSgRwwB2GC-pdWM-o5X7JsVregZh1nCyOFBYvMYYQuDY2Pi3r49sXC6PrFvEvR4OzJ0phxuwFWvwG_IFVmYUaMalbpOdiLOgDl5R68gcwrQ-4NPYAdX_9tmLBLJZYFl5gpbhI5nwYDxGBIWpPk63oNIIYd9sVgMj7THdG_-tH5oV_eCT8MmsMK-_rOQ_o5GcmzwdMWvqn9enhf0995Rhf28ANBEEseEiWlKw_dCaRZ9OQE7Fp0GlCOtGmlpN6JN2UrKsKAS_m6dzAg",
  "expires_in": 3600,
  "token_type": "Bearer",
  "scope": "api1.read"
}
If you take this access token over to jwt.ms, you can see that it contains the following claims:
// header
{
  "alg": "RS256",
  "kid": "0737BD561E61113E315ED47AC530BFB9",
  "typ": "at+jwt"
}

// payload
{
  "iss": "https://localhost:5000",
  "nbf": 1630168967,
  "iat": 1630168967,
  "exp": 1630172567,
  "aud": "api1",
  "scope": [
    "api1.read"
  ],
  "client_id": "oauthClient",
  "jti": "F436FDF99E8CF6A4D2C4C693ABA7C0F8"
}
Protecting an API
You can now use this access token to access API, protected by your implementation of IdentityServer.
You can quickly spin up an API using the .NET CLI, using the webapi template:
dotnet new webapiTo protect the API, you can either use the JWT authentication handler from Microsoft or the IdentityServer specific implementation. I prefer the IdentityServer specific version because it sets some useful default options and can support reference tokens & token introspection if you decide to move away from JWTs.
dotnet add package Microsoft.AspNetCore.Authentication.JwtBearer
You’ll then want to add the following to your API’s ConfigureServices method:
services.AddAuthentication("Bearer")
    .AddJwtBearer("Bearer", options =>
    {
        options.Audience = "api1";
        options.Authority = "https://localhost:5000";
    });
Where the authority is the URL of your IdentityServer, and the audience name is the name of the API resource that represents it. This authentication handler will automatically fetch the discovery document from IdentityServer on first use.
You’ll also need to add the authentication middleware, by updating your Configure method to look something like this:
public void Configure(IApplicationBuilder app)
{
    app.UseRouting();

    app.UseAuthentication();
    app.UseAuthorization();

    app.UseEndpoints(endpoints => endpoints.MapDefaultControllerRoute());
}
You can then require an access token by using the AuthorizeAttribute on one of your endpoints.
To use the access token, simply attach it to an HTTP request, using the Authorization header.
For example:
Authorization: Bearer eyJhbGciOiJSUzI1NiIsImtpZCI6IjA3MzdCRDU2MUU2MTExM0UzMTVFRDQ3QUM1MzBCRkI5IiwidHlwIjoiYXQrand0In0.eyJpc3MiOiJodHRwczovL2xvY2FsaG9zdDo1MDAwIiwibmJmIjoxNjMwMTY4OTY3LCJpYXQiOjE2MzAxNjg5NjcsImV4cCI6MTYzMDE3MjU2NywiYXVkIjoiYXBpMSIsInNjb3BlIjpbImFwaTEucmVhZCJdLCJjbGllbnRfaWQiOiJvYXV0aENsaWVudCIsImp0aSI6IkY0MzZGREY5OUU4Q0Y2QTREMkM0QzY5M0FCQTdDMEY4In0.HG-1bNAv5OQf_Vn8vI_-G5rK1ueQhsN_VSx_M78rU_n85hc1BH7Nt6p3MKeGPDy6YYed9krpGSgRwwB2GC-pdWM-o5X7JsVregZh1nCyOFBYvMYYQuDY2Pi3r49sXC6PrFvEvR4OzJ0phxuwFWvwG_IFVmYUaMalbpOdiLOgDl5R68gcwrQ-4NPYAdX_9tmLBLJZYFl5gpbhI5nwYDxGBIWpPk63oNIIYd9sVgMj7THdG_-tH5oV_eCT8MmsMK-_rOQ_o5GcmzwdMWvqn9enhf0995Rhf28ANBEEseEiWlKw_dCaRZ9OQE7Fp0GlCOtGmlpN6JN2UrKsKAS_m6dzAgAdding a user interface for user authentication
Up until now, IdentityServer has been running without a UI. Let’s change this by pulling in the Quickstart UI from GitHub that uses ASP.NET Core MVC.
To download the QuickStart UI, either copy all folders in the repo into your project, or use the PowerShell or curl command from the repo’s readme (again, while within your project folder). For example:
iex ((New-Object System.Net.WebClient).DownloadString('https://raw.githubusercontent.com/IdentityServer/IdentityServer4.Quickstart.UI/main/getmain.ps1'))
To take advantage of these new controllers and views, you’ll need to add the following to your ConfigureServices method:
services.AddControllersWithViews();
And then update your Configure method to look something like the following, by adding the middleware for static files, authorization, and endpoints.
public void Configure(IApplicationBuilder app, IWebHostEnvironment env)
{
    app.UseStaticFiles();
    app.UseRouting();

    app.UseIdentityServer();
    app.UseAuthorization();

    app.UseEndpoints(endpoints => endpoints.MapDefaultControllerRoute());
}
Now when you run the project, assuming you are running in developer mode, you should get a splash screen. Hooray! Now that you have a UI, you can now start authenticating users.
Integrating an ASP.NET Core MVC app with IdentityServer
To demonstrate authentication using OpenID Connect, you’ll need to create another web application and configure it as a client application within IdentityServer.
Let’s start by adding a new client entry within IdentityServer:
new Client
{
    ClientId = "oidcClient",
    ClientName = "Example Client Application",
    ClientSecrets = new List<Secret> {new Secret("SuperSecretPassword".Sha256())}, // change me!

    AllowedGrantTypes = GrantTypes.Code,
    RedirectUris = new List<string> {"https://localhost:5002/signin-oidc"},
    AllowedScopes = new List<string>
    {
        IdentityServerConstants.StandardScopes.OpenId,
        IdentityServerConstants.StandardScopes.Profile,
        IdentityServerConstants.StandardScopes.Email,
        "role",
        "api1.read"
    },

    RequirePkce = true,
    AllowPlainTextPkce = false
}
This configuration adds a new client application that uses the recommended flow for server-side web applications: the authorization code flow with Proof-Key for Code Exchange (PKCE). For this client, you have also set a redirect URI. Because this flow takes place via the browser, IdentityServer must know an allowed list of URLs to send the user back to, once user authentication and client authorization is complete; what URLs it can return the authorization result to.
An ASP.NET Core MVC client application
Now you can create the client application itself.
For this, you’ll need another ASP.NET Core website, this time using the mvc template, and again, with no authentication.
dotnet new mvc
Before adding a remote authentication scheme such as OpenID Connect, you’ll need to add a local authentication scheme, a cookie, which you can add to your ConfigureServices method:
services.AddAuthentication(options =>
    {
        options.DefaultScheme = "cookie";
    })
    .AddCookie("cookie");
This tells your application to use cookie authentication for everything (the DefaultScheme).
So, if you call sign in, sign out, challenge, etc. then this is the scheme that will be used.
This local cookie is necessary because even though you’ll be using IdentityServer to authenticate the user and create a Single Sign-On (SSO) session, every individual client application will maintain its own, shorter-lived session.
You can now update your authentication configuration to use OpenID Connect to find out who the user is.
First, install the OpenID Connect authentication NuGet package:
dotnet add package Microsoft.AspNetCore.Authentication.OpenIdConnectAnd then you can update your authentication configuration to look like the following:
services.AddAuthentication(options =>
    {
        options.DefaultScheme = "cookie";
        options.DefaultChallengeScheme = "oidc";
    })
    .AddCookie("cookie")
    .AddOpenIdConnect("oidc", options =>
    {
	    options.Authority = "https://localhost:5000";
        options.ClientId = "oidcClient";
        options.ClientSecret = "SuperSecretPassword";

        options.ResponseType = "code";
        options.UsePkce = true;
        options.ResponseMode = "query";

        // options.CallbackPath = "/signin-oidc"; // default redirect URI

        // options.Scope.Add("oidc"); // default scope
        // options.Scope.Add("profile"); // default scope
        options.Scope.Add("api1.read");
        options.SaveTokens = true;
    });
By default, the ASP.NET Core OpenID Connect handler will use the implicit flow with the form post response mode. The implicit flow is in the process of being deprecated, and the form post response is becoming unreliable thanks to 3rd party cookies policies being rolled out by browsers. As a result, you have updated these to use the authorization code flow, PKCE, and the query string response mode.
UsePkce is a relatively new setting in ASP.NET Core, check out my other articles if you need to implement PKCE in .NET Core 2.1 or .NET Framework web applications.
I’ve also shown some of the default settings used by the OpenID Connect authentication handler.
By default, the redirect URL will use the /signin-oidc path.
This is fine; however, you’ll need to add a unique callback path for each authentication handler you have in your application.
ASP.NET Core also adds the oidc and profile scopes you can clear and/or add extra scopes if required.
SaveTokens causes the identity and access tokens to be saved, accessible using code such as HttpConect.GetTokenAsync("access_token").
To have your callback path work, you’ll need to again update your Configure method to call the ASP.NET Core authentication middleware:
public void Configure(IApplicationBuilder app, IWebHostEnvironment env)
{
    app.UseStaticFiles();
    app.UseRouting();

    app.UseAuthentication();
    app.UseAuthorization();

    app.UseEndpoints(endpoints => endpoints.MapDefaultControllerRoute());
}
And again, add the AuthorizationAttribute to a controller action to authenticate the user using a cookie or challenge the user via oidc.
[Authorize]
public IActionResult Privacy() => View();
The next time that you run the application and select the Privacy page, you’ll receive a 401 unauthorized.
This, in turn, will be handled by your DefaultChallengeScheme (your OpenID Connect authentication handler), which will 302 redirect you to your IdentityServer authorization endpoint.
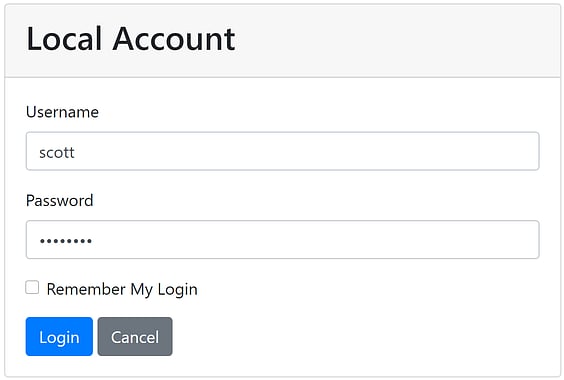
The IdentityServer QuickStart login screen
Upon successful login, you’ll be redirected back to your client application’s redirect URI, be logged in using your local cookie, and then redirected back to the page you were trying to access (the privacy page). That’s all that’s required for wiring up a simple OpenID Connect client application in ASP.NET Core!
As of IdentityServer4 v4, the OAuth consent page is no longer enabled by default. If you are dealing with 3rd party client applications or protected resources, I recommend that you re-enable this for your apps.
IdentityServer with Entity Framework Core
Currently, you are using in-memory stores which, as I noted before, are only suitable for demo purposes or, at most, very lightweight implementations. Ideally, you’d want to move your various stores into a persistent database that won’t be wiped on every deploy or require a code change to add a new entry.
IdentityServer has an Entity Framework (EF) Core package that you can use to implement client, resource, scope, and persisted grant stores using any EF Core relational database provider.
For this tutorial you will be using SQL Server (SQL Express or Local DB will do), so you’ll need the following nuget packages:
dotnet add package IdentityServer4.EntityFramework
dotnet add package Microsoft.EntityFrameworkCore.SqlServerIf you don’t want to use IdentityServer’s Entity Framework library, then you’ll need to create your own IdentityServer storage layer.
Storing persisted grants using the operational store
The persisted grant store maintains temporary data such as consent, reference tokens, refresh tokens, device codes, authorization codes, and more. Without a persistent store for this data, you will not be able to reliably load balance IdentityServer.
To use IdentityServer’s default Entity Framework store, you’ll first need to get a connection string and set the migrations assembly:
// using local db (assumes Visual Studio has been installed)
const string connectionString = @"Data Source=(LocalDb)\MSSQLLocalDB;database=Test.IdentityServer.EntityFramework;trusted_connection=yes;";
var migrationsAssembly = typeof(Startup).GetTypeInfo().Assembly.GetName().Name;
You can then add support for the persisted grant store by updating your call to AddIdentityServer with:
AddOperationalStore(options => options.ConfigureDbContext =
    builder => builder.UseSqlServer(
        connectionString,
        sqlOptions => sqlOptions.MigrationsAssembly(migrationsAssembly)))
In this case, you are setting the assembly to store your EF migrations as the current assembly. This is necessary to target DbContexts not located in your hosting project (in this case, it is in a nuget package) and allows us to run EF migrations. Otherwise, you’ll be met with an exception with a message such as:
Your target project 'Project.Host' doesn't match your migrations assembly 'Project.BusinessLogic'. Either change your target project or change your migrations assembly. Change your migrations assembly by using DbContextOptionsBuilder. E.g. options.UseSqlServer(connection, b => b.MigrationsAssembly("Project.Host")). By default, the migrations assembly is the assembly containing the DbContext.

Change your target project to the migrations project by using the Package Manager Console's Default project drop-down list, or by executing "dotnet ef" from the directory containing the migrations project.
Storing IdentityServer clients and scopes using the configuration store
To add persistent storage for your scope and client stores, you’ll need something similar, this time replacing the calls to AddInMemoryClients, AddInMemoryIdentityResources, AddInMemoryApiScopes, and AddInMemoryApiResources:
AddConfigurationStore(options => options.ConfigureDbContext =
    builder => builder.UseSqlServer(
        connectionString,
        sqlOptions => sqlOptions.MigrationsAssembly(migrationsAssembly)))
These registrations also add a CORS policy service that initializes itself from data in your client records. I recommend using this CORS service. Do not just allow all origins.
Running the IdentityServer EF migrations
To run EF migrations, you’ll need the EF Core tooling installed, and the Microsoft.EntityFrameworkCore.Design package installed in your project:
dotnet add package Microsoft.EntityFrameworkCore.DesignOnce you have this, you can create your migrations using:
dotnet ef migrations add InitialIdentityServerMigration -c PersistedGrantDbContext
dotnet ef migrations add InitialIdentityServerMigration -c ConfigurationDbContext
You can then create your databases by calling dotnet ef database update on each of the DB contexts:
dotnet ef database update -c PersistedGrantDbContext
dotnet ef database update -c ConfigurationDbContextInitializeDbTestData method in this article’s GitHub repository.
IdentityServer with ASP.NET Core Identity
To add a persistent store for users, IdentityServer offers out of the box integration for ASP.NET Core Identity (aka ASP.NET Identity 3). ASP.NET Identity includes the basic features you’d need to implement a production-ready user authentication system, including password hashing, password reset, and lockout functionality.
This tutorial will use the Entity Framework Core implementation of the ASP.NET user and roles stores, which means you’ll need the following NuGet packages:
dotnet add package IdentityServer4.AspNetIdentity
dotnet add package Microsoft.AspNetCore.Identity.EntityFrameworkCore
dotnet add package Microsoft.EntityFrameworkCore.SqlServer
You’ll then need to create a DbContext that inherits ASP.NET Identity’s IdentityDbContext and override the constructor to use a non-generic version of DbContextOptions.
This is because IdentityDbContext only has a constructor accepting the generic DbContextOptions which, when you are registering multiple DbContexts, results in an InvalidOperationException.
It would be great if this ceremony was one day made unnecessary.
public class ApplicationDbContext : IdentityDbContext {
    public ApplicationDbContext(DbContextOptions<ApplicationDbContext> options) : base(options) { }
}
With these libraries installed and your new DbContext, you can now register then need to add a registration for the ASP.NET Identity DbContext to your ConfigureServices method.
These registrations should be made before your IdentityServer registrations.
services.AddDbContext<ApplicationDbContext>(builder =>
    builder.UseSqlServer(connectionString, sqlOptions => sqlOptions.MigrationsAssembly(migrationsAssembly)));

services.AddIdentity<IdentityUser, IdentityRole>()
    .AddEntityFrameworkStores<ApplicationDbContext>();
It’s important to know that calling AddIdentity will change your application’s default cookie scheme to IdentityConstants.ApplicationScheme.
You can then configure IdentityServer’s internal code to use ASP.NET Identity by replacing the call to AddTestUsers with:
AddAspNetIdentity<IdentityUser>()At a high level, this call does the following:
- Adds an ASP.NET Identity compatible profile service (how IdentityServer generated user claims)
- Adds an extended implementation of ASP.NET Identity’s
IUserClaimsPrincipalFactory(how ASP.NET Identity transforms a user object into claims) - Configures IdentityServer to use ASP.NET Identity’s cookies and tweaks those cookies to be suitable for OpenID Connect
You’ll also need database migrations for this context, using:
dotnet ef migrations add InitialIdentityServerMigration -c ApplicationDbContext
dotnet ef database update -c ApplicationDbContext
That’s all that’s needed to wire up IdentityServer itself to use ASP.NET Core Identity, but unfortunately, the Quickstart UI you downloaded earlier is no longer going to work properly, as it is still using a TestUserStore.
However, you can modify the QuickStart UI to work with ASP.NET Core Identity by replacing some code.
This tutorial will use the ASP.NET Identity’s SignInManager during authentication.
The SignInManager meets mosts basic use cases, but if you have any complex user authentication requirements, or want greater control over the user experience, then I recommend using ASP.NET Identity’s UserManager instead.
Let’s start with the AccountController.
First, you’ll need to change the constructor to accept the ASP.NET Identity SignInManager, instead of the current TestUserStore.
Your constructor should now look something like this:
private readonly IIdentityServerInteractionService _interaction;
private readonly IClientStore _clientStore;
private readonly IAuthenticationSchemeProvider _schemeProvider;
private readonly IEventService _events;
private readonly SignInManager<IdentityUser> _signInManager;

public AccountController(
    IIdentityServerInteractionService interaction,
    IClientStore clientStore,
    IAuthenticationSchemeProvider schemeProvider,
    IEventService events,
    SignInManager<IdentityUser> signInManager)
{
    _interaction = interaction;
    _clientStore = clientStore;
    _schemeProvider = schemeProvider;
    _events = events;

    _signInManager = signInManager;
}
By removing the TestUserStore, you should see that you broke a single method: Login.
I recommend changing the failing validation block to the following:
// validate username/password against in-memory store
if (_users.ValidateCredentials(model.Username, model.Password))
{
    var user = _users.FindByUsername(model.Username);
    await _events.RaiseAsync(new UserLoginSuccessEvent(user.Username, user.SubjectId, user.Username, clientId: context?.Client.ClientId));

    // only set explicit expiration here if user chooses "remember me".
    // otherwise we rely upon expiration configured in cookie middleware.
    AuthenticationProperties props = null;
    if (AccountOptions.AllowRememberLogin && model.RememberLogin)
    {
        props = new AuthenticationProperties
        {
            IsPersistent = true,
            ExpiresUtc = DateTimeOffset.UtcNow.Add(AccountOptions.RememberMeLoginDuration)
        };
    };

    // issue authentication cookie with subject ID and username
    var isuser = new IdentityServerUser(user.SubjectId)
    {
        DisplayName = user.Username
    };

    await HttpContext.SignInAsync(isuser, props);

    // TODO: existing return URL handling...
}You’ll need to do something similar in the ExternalController, for account linking and provisioning when using an external identity provider such as Google or Azure AD.
var user = _users.FindByExternalProvider(provider, providerUserId);// create test user from claims
var user = _users.AutoProvisionUser(provider, providerUserId, claims.ToList());You should be able to run with that and start tweaking the QuickStart UI to meet your business needs. If you’re stuck, check out the completed sample for this tutorial on GitHub.
User registration and password reset
This tutorial only brought in the basic use of ASP.NET Core Identity. For features like user registration and password reset, there’s nothing IdentityServer specific you’ll need to do. Just follow the regular use of ASP.NET Identity!
If you’re new to ASP.NET Identity, check out my Pluralsight course for a deep dive into the library.
Next Steps
This tutorial has covered the basics of IdentityServer and shown you how to use it to protect an ASP.NET Core web app and API. This should be enough to get you started, but before you go into production, don’t forget to address the points listed in the deployment documentation.
For more advanced use cases, check out some of my other articles to learn how to: